Things you need a long the way:
- qemu https://www.qemu.org/download/
make(should come with most systems)- nasm https://www.nasm.us/
If you like you can find the complete code over at github.
The basics of printing strings on the screen
First things first lets write some characters on the screen but how can we do this ?
Well since we are living in the system just right after the BIOS we can make use of BIOS interrupt calls like int 10H.
For a complete list see: https://en.wikipedia.org/wiki/INT_10H
These are function calls for you might have guessed it Basic Input and Output (System) operations. The calls are mostly primed by setting al and ah to specific values and then invoking the appropriate interrupt.
If you take a closer look at the int 10H table you can find a function called "Teletype Output" which requires ah = 0xE and then a character in al (we can skip pagenumber and color for now so don't care about bx at all).
So lets get going shall we?
boot.asm
mov ah, 0x0E     ; setup for "teleype output"
mov al, 'h'      ; load character 'h'
int 0x10         ; call the interrupt
Ok now we got a boot.asm file but how can we run it ?
First we need an assembler preferably nasm to assembly a binary from our file. This is straight forward with nasm as following:
nasm -f bin boot.asm -o boot.bin
Our first binary yay! \( ゚ヮ゚)/ But... if we ask an emulator like qemu to run the binary nothing would happen because two magic bytes are missing in just the right place.
Back in the olden days disks had a MasterBootRecord which was exactly 512 bytes (one sector) big and stored right at the start of a disk. It gave basic partition info and other stats about the disk it was on see https://en.wikipedia.org/wiki/Master_boot_record
The magic bytes we are looking for are in position 510 and 511 so the very last two. They need to have the values 0x55 and 0xAA and are called Boot signature
Thanks to nasm there is an easy way to do this via db 0 which stands for declare byte with value zero. This can come in handy when crafting custom binary files by the way.
As an example
db 3
db 0xFF
db 'x'
db 0
yields a file which looks like this:
00000000: 03ff 7800 55aa
and as we wanted we got 4 bytes with the repective value 0x03, 0xFF, 0x78( 'x' in ascii ) , 0x00 and finally our last two signature bytes 0x55 and 0xAA.
We could now calculate the size of your two mov and one int instruction and write enough zeros until we hit the last to bytes and write db 0x55, 0xAA but ain't nobody got time for that.
So there is an helper called times which does something x-times. Thus we could write times 123 db 0 to declare 123 zeros bytes. But how many zero bytes do we need to pad until we reach the end of our sector ?
Fortunately there are also two little helper for that. The first one is $ - current address in the file and $$ the first address in the current section of code. Now for some math we know the sector has 512 bytes and we want to pad everything from our code until the last to bytes padded with zeros. This would result in
amount_to_pad = 510 - (current_address - start_of_section)
the resulting line in nasm would look like this:
times 510 - ( $ - $$ ) db 0
If we append this line to our boot.asm the resulting boot.bin should look like this:
boot.bin
00000000: b40e b068 cd10 0000 0000 0000 0000 0000  ...h............
00000010: 0000 0000 0000 0000 0000 0000 0000 0000  ................

    a ton of zeros....

000001e0: 0000 0000 0000 0000 0000 0000 0000 0000  ................
000001f0: 0000 0000 0000 0000 0000 0000 0000       ..............
But the two byte is still missing so lets add them:
boot.asm
mov ah, 0x0E     ; setup for "teleype output"
mov al, 'h'      ; load character 'h'
int 0x10        ; call the interrup

times 510 - ( $ - $$ ) db 0

db 0x55, 0xAA
The last line now should read:
000001f0: 0000 0000 0000 0000 0000 0000 0000 55aa ..............U.
Or displayed in a table the structure should be like this.
| Byte | Value       | Comment                       |
| ---- | ----------- | ----------------------------- |
| 0    | mov ah, 0x0 | Our code...                   |
| ..   | 0           | filling bytes                 |
| 511  | 0x55        | First byte of boot signature  |
| 512  | 0xAA        | Second byte of boot signature |
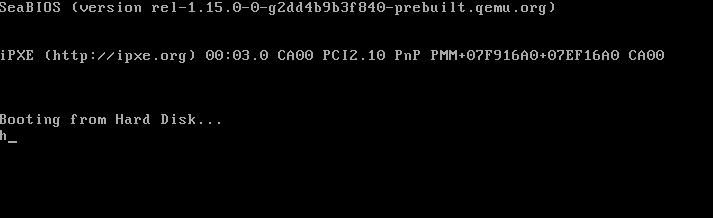
Lets try and give it a a boot with
qemu-system_x86-64 boot.bin
and you should see the qemu happily emulating a system which just printed the letter 'h'.
Makefile
Before we move on to printing the whole "Hello World" string lets do some housekeeping.
For a few decades there has been a tool called Make which helps with automating tasks to make things obviously.
It's pretty simple to use for basic use cases and in our case it keeps us from writing things all over again or hitting up-arrow to find the command in the terminal.
Make is invoked by running the make command which lookes for an abtly named Makefile.
In this file we need to declare what we want to be made and how.
So we want a boot.img being made from the boot.asm which would be written as such
Makefile
boot.bin: boot.asm
	nasm -f bin boot.asm -o boot.bin
If you now remove the boot.bin and run make it should magically reappear and be freshly build from the boot.asm
To make things even a bit mor comfortable we can introduce a second command in our makefile run.
Makefile
boot.bin: boot.asm
	nasm -f bin boot.asm -o boot.bin

run: boot.bin
	qemu-system-x86_64 -drive format=raw,file=boot.bin
As you might have noticed run needs boot.bin to work and luckily make automatically tries to build boot.bin as it is an dependency.
So by the simple command of make run you should now see a qemu window popup and emulate the freshly build boot.img
Printing multiple characters
Now that we got some automated assembly going we can write the full string on the display.
The naive way would be to just print all latters one after another like this:
mov ah, 0x0E     ; setup for "teleype output"
mov al, 'h'      ; load character 'h'
int 0x10         ; call the interrupt

mov al, 'e'      ; load character 'e'
int 0x10         ; call the interrupt

mov al, 'l'      ; load character 'l'
int 0x10         ; call the interrupt
int 0x10         ; call again since 'l' is already loaded

mov al, 'o'      ; load character 'o'
int 0x10         ; call the interrupt

...
But as you can guess this is not the proper way to print strings.
Thankfully there is a function called "Load String Byte" or in short lodsb.
The instruction copies a byte stored at si and moves it to al and increments si.
So lets get a string to si and loop over it!
boot.asm
[org 0x7C00]
[bits 16]
mov si, hello_world_string ; move the string address into si
mov ah, 0x0E ; set teletype output mode
print_string: ; print string label
lodsb ; load byte from si to al and increment pointer
int 0x10 ; print_string al to screen
test al, al ; check if al is zero for zero terminated string
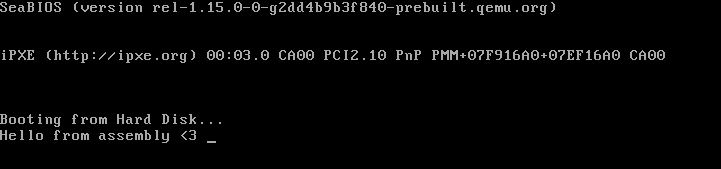
jnz print_string ; if not keep printing
hello_world_string: db "Hello from assembly <3", 0
times 510-($ - $$) db 0
db 0x55, 0xAA
A few explanations [org 0x7C00] tells the assembler to await our code at offset 0x7C00 which is where the BIOS loads our first secord from disc into ram. And [bits 16] tells nasm to use 16bit instructions for details see https://www.nasm.us/xdoc/2.10.09/html/nasmdoc6.html
hello_world_string: db "Hello from assembly <3", 0
defines a string via the db from earlier and ,0 appends a 0 so we have a null terminated string.
mov si, hello_world_string
moves the address of the declared hello_world_string into the si register.
    test al,al
    jnz print_string
Is testing if al is zero and if it is not then jump back to the print_string label since there are still characters to print.
If al is zero then the jnz does not jump back top but just keeps going to the next lower line in our assembly code.
Loading data from disk aka lets write a little kernel
To recap we now have a small bootable program which prints some text on the screen. great.
If you remember the BIOS loads our MBR (the first 512 bytes) into memory at address 0x7C00 therefore our program can only be 510 bytes long ( 1 sector with 512 bytes minus the two signature bytes at the end ) at maximum which is fairly small.
Optionally we could load the next sector from the disk and do everything we want in there.
Luckily there is a handy interrupt called int 13h ah=2 aka Read Sectors From Drive see https://en.wikipedia.org/wiki/INT_13H
As you can see it takes 2 in ah, the count of sectors to read in al, the cylinder to read from in ch, the actual sector index in cl, the head to read with in dh, the adress where to put in memory in bh and finally the drive to read from in dl.
If you're wondering what im talking about in the age of SSDs and NVMe take a glance at this https://en.wikipedia.org/wiki/Cylinder-head-sector.
As the BIOS already read sector number one the MBR form our disk we will need to read the second sector from the disk so lets note cl=2. We want to read from the first cylinder of our disk thats ch=0 Another nice thing is since we just started the system the index of our boot drive is stored in dl and we won't really need to do anything about it. We could for safety call the BIOS and ask again to double check but hey thats out of scope for now. And finally we want to read 1 sector thus al=1 and write the data to bx=0x1000 some arbitrary offset in our memory.
boot.asm
[org 0x7C00]
[bits 16]

KERNEL_OFFSET: equ 0x1000                       ; arbitrary offset in memory


mov [boot_disk], dl                             ; save the disk index

mov si, disk_read_string                        ; move string pointer to source index
mov ah, 0x0E                                    ; set teletype mode

print_read_message:
    lodsb                                       ; load byte from si to al and increment pointer
    int 0x10                                    ; print_read_message al to screen
    test al, al                                 ; check if al zero for zero terminated string
    jnz print_read_message                      ; if not keep printing


; load the second sector from disk where our code is stored

mov ah, 2                                       ; ah = 2 notifies read from drive
mov al, 1                                       ; al = amount of sectors to read
mov bx, KERNEL_OFFSET                           ; bx = address to write the kernel to
mov cl, 2                                       ; sectors are 1-index so we read the second sector
mov ch, 0                                       ; cylinder to read from
mov dh, 0                                       ; head to read with
mov dl, [boot_disk]                             ; restore disk index from variable
int 0x13                                        ; call interrupt

jmp KERNEL_OFFSET                               ; jump to our loaded data and execute it


; variable to store boot drive index in
boot_disk: db 0
; message for debug purposes with a carriage return, line feed and null
disk_read_string: db "Trying to read kernel from sector 2", 0x0D, 0x0A, 0

; padding and boot signature
times 510-($ - $$) db 0
db 0x55, 0xAA
Now we have a simple loader which load the second sector of our boot disk and jumps to it. But nothing happens since there is no second sector. Lets make one.
kernel.asm
[org 0x1000]                                    ; note we need to tell nasm our code is loaded to 0x1000

mov si, hello_disk_string                       ; move the string address into si
mov ah, 0x0E                                    ; set teletype output mode

print_string:
    lodsb                                       ; load byte from si to al and increment pointer
    int 0x10                                    ; print_string al to screen
    test al, al                                 ; check if al zero for zero terminated string
    jnz print_string                            ; if not keep printing


cli                                             ; clear all interrupts
hlt                                             ; halt the cpu

; new string
hello_disk_string: db "Hello from disk sector two <3", 0
; padding
times 512-($ - $$) db 0
A small simple program which again only prints a string on the screen using lodsb. But with two additions one is that we now use [org 0x1000] to tell nasm where the code lives and we add a cli,hlt at the end of our program. This basically tells the CPU to not care about anything and go to sleep else it would just keep on doing nothing or react to interrupts and waste energy.
So we got two programs now but how can we combine them ?
First we need two add our little kernel in the Makefile to assemble it.
Makefile
...

kernel.bin: kernel.asm
	nasm -f bin kernel.asm -o kernel.bin

...
Simple as that.
To combine two files in linux you can concatenate them together via cat file_a file_b > file_ab
We thus can make an os.img command where we cat the boot.bin and kernel.bin together in one os.bin
Makefile
os.img: boot.bin kernel.bin
	cat boot.bin kernel.bin > os.img

boot.bin: boot.asm
	nasm -f bin boot.asm -o boot.bin

kernel.bin: kernel.asm
	nasm -f bin kernel.asm -o kernel.bin

run: os.img
	qemu-system-x86_64 -drive format=raw,file=os.img
Much better.
For a final cleanup lets sprinkle some Makefile magic in here
First lets create an array of our binaries which we want to concatenate and use it in our os.img command
Makefile
parts = boot.bin kernel.bin

os.img: $(parts)
	cat $^ > os.img
$^ takes all dependencies, so in our case the list of binaries boot.bin and kernel.bin from $(parts)
And since every .bin is produces in the same way we can make a catch-all command in our Makefile telling make that if it ever needs to build a .bin from an .asm to use this command.
$< replaces the first match from %.asm in the command and $@ is the name of the output target.
Makefile
%.bin: %.asm
	nasm -f bin $< -o $@
As a good measure we can introduce make clean to well cleanup our build environment.
Makefile
clean:
	rm $(parts) os.img
Makefile ( complete )
parts = boot.bin kernel.bin

os.img: $(parts)
	cat $^ > os.img
	echo "Concatenating $^ to the final image"

%.bin: %.asm
	nasm -f bin $< -o $@
	echo "Building $@ from $<"

run: os.img
	qemu-system-x86_64 -drive format=raw,file=os.img

clean:
	rm $(parts) os.img
For more make details please look here https://www.gnu.org/software/make/manual/html_node/Automatic-Variables.html
Draw the first Pixel
I know this has been a long walk until here but stay with me we are going to draw our first pixel!
Remember the "Set Teletype Ouptut" interrupt which gave us access to write character on the screen ?
Characters are only a bunch of pixels in an prearrange format. So there must be a way to set only one pixel at a time. And sure there is the infamous mode 13h or mode 0x13 [https://en.wikipedia.org/wiki/Mode_13h] (https://en.wikipedia.org/wiki/Mode_13h) This mode gives us a 320x200 canvas to draw on with a palette of 256 different colors.
All we have to to is set ah = 0 and al = 0x13 and call int 0x10 right at the end of our kernel.asm
kernel.asm
[org 0x1000]                                    ; note we need to tell nasm our code is loaded to 0x1000

mov si, hello_disk_string                       ; move the string address into si
mov ah, 0x0E                                    ; set teletype output mode

print_string:
    lodsb                                       ; load byte from si to al and increment pointer
    int 0x10                                    ; print_string al to screen
    test al, al                                 ; check if al zero for zero terminated string
    jnz print_string                            ; if not keep printing

mov ax, 0x13                                    ; set ah 0 and al 0x13
int 0x10                                        ; set video mode

cli                                             ; clear all interrupts
hlt                                             ; halt the cpu

; new string
hello_disk_string: db "Hello from disk sector two <3", 0
; padding
times 512-
Call make run and...
![]()
...see nothing ?!
Yeah thats right since our video memory is empty and all zeros its just black. Note that our text from before and anything else just disappeared.
"But you promised pixels!?!" I know... I know and again there is an interrupt to the rescue!
This time its int 10h ah=0ch which does exactly this Write graphics pixel sounds good lets get going.
The interrupt needs little setup in the form of
al = color( BIOS Colors)bh = page(zero is the screenbuffer),cx = x coordinatedx = y coordinate
To set a pixel with coordinates 5,15 ( Note: top left is 0,0 ) to the color yellow we write:
mov ah, 0x0C        ; int 0x10 write pixel
mov bh, 0           ; page number
mov al, 0x0E        ; color yellow
mov cx, 5           ; x coordinate
mov dx, 15          ; y coordinate
int 0x10            ; call interrupt
Note
You can add a few statements like to make life easier down the line.
COLOR_BLUE:  equ 0x01
COLOR_GREEN: equ 0x02
COLOR_RED:   equ 0x04
If put this code right before the cli hlt section you should now see the following:

Go ahead and add a few pixels with different color now that you got the might of drawing pixels :3
Cleanup
Just for a better structure add a file called gfx.asm in which put the following ( don't forget to add it to the parts array in the Makefile)
gfx.asm
; set a pixel in mode 13
; ax - color
; bx - (default) 0
; cx - x coordinate
; dx - y coordinate


set_pixel:

    push bx             ; save bx
    ; automatic way - https://stanislavs.org/helppc/int_10-c.html
    mov ah, 0x0C        ; int 0x10 write pixel
    mov bh, 0           ; page number
    int 0x10            ; call interrupt

    pop bx              ; restore bx

    ret
then in the kernel.asm go ahead and add the following right after the hlt instruction and before the hello_disk_string
%include "gfx.asm"
Now you have access to a small helper function called set_pixel which you can use from the kernel.asm
mov ax, 0x0E
mov cx, 5
mov dx, 15
call set_pixel
Its not much but its cleans up our kernel.asm and makes it more readable.
Clearing the screen
After you've added some more pixels and color to the screen you probably noticed that they won't disappear. And why should they you flipped the bits to let them appear and never unset them.
You could try and keep a list of each pixel you set and then reset them one by one with black but thats neither efficient nor fun and thats what writing assembly should be in the first place.
So lets take things we learned and combine them to clear the screen.
You may remember that the screen is 320 by 200 bytes big thus in total 64000 bytes and the memory for the video RAM starts at 0xA0000. If we go back to the beginning with lodsb which was loading stuff from an address in si (source index) into al there is also the exact opposite stosb which stores bytes from al into di the destination index.
In a nutshell we could just say "Hey here is black in al for the next 64000 pixels move it to di increment di keep going until you're done". So lets do this:
gfx.asm
; clear screen with color from BL
clear_screen:

    push es                     ; save es
    mov ax, 0xA000              ; prepeare direct memory access to Video RAM
    mov es, ax                  ; move to es
    mov ax, 0                   ; start at top left pixel
                                ; top right
                                ; 0 will put it in top left corner.
                                ; 320 would be top right
                                ; 320 x 200 pixels -> center is 320 * 100 + 160

    mov di, ax                  ; load ax into destination
    mov al, bl
    mov cx, 64000               ; set counter to 320 * 200 pixels to draw
    rep stosb                   ; repeat storebyte instruction
    pop es                      ; restore es
    ret
And just like that we can use we function in our kernel's "main function" to clean the screen once in a while.
kernel.asm
...
mov ax, 0x0E            ; yellow
mov cx, 15
mov dx, 10

call set_pixel

call clear_screen

mov ax, 0x02            ; green
mov cx, 50
mov dx, 50

call set_pixel
...
Since we cleared the screen after drawing the yellow pixel you should now only see the green pixel at 50,50.
"Game Loop" and sleeping
Now that we can clear the screen we can go for a full game loop. If we would just go for a simple loop as this:
kernel.asm
game_loop:

    call clear_screen

    ; draw something

    jmp game_loop
the program would just try to clear the screen, draw something and jump back up as fast as it can.
That would on the one hand be so fast that we can't really see anything and one the other hand it would waste a lot of power.
Thus lets give our CPU a bit of sleep once in a while with int 15h ah=86h https://stanislavs.org/helppc/int_15-86.html
time.asm
; sleep for cx:dx microseconds µs
; cx    | dx        |   seconds |   µs
; --------------------------------------------------
; 0xf   | 0x4240    |   1       |   1_000_000
; 0x7   | 0xa120    |   0.5     |   500_000
; 0x1   | 0x86a0    |   0.1     |   100_000
; 0x0   | 0x8235    |   0.033   |   33_333 (~30FPS)


; hardcoded for 0.1s sleep or ~10 loops per second
sleep:
    pusha               ; save all registers

    mov ah, 0x86        ; wait
    mov cx, 0x1         ; upper ms
    mov dx, 0x86a0      ; lower ms

    int 15h             ; call

    popa                ; restore all registers

    ret
After including time.asm we can give the CPU some rest by calling sleep
kernel.asm
game_loop:

    call clear_screen

    ; draw something
    call sleep
    jmp game_loop
Drawing directly to VGA ram
After a while when you played around with drawing a lot of pixels you may notice that your system starts to glitch and stutter.
This is mainly because interrupts are a bit slow and we learned that we can directly set pixels in VGA memory beginning at offset 0xA0000.
So how about we mov a pixel to offset = 0xA0000 + ( Y * 320) + X
To make life easier add this line at the top of kernel.asm
kernel.asm
VGA_SEGMENT: equ 0xA000
gfx.asm
; set pixel directly in VGA memory
; al - color
;
; cx - x
; dx - y
set_pixel_fast:

    push es                     ; save es
    push bx                     ; save bx
    push ax                     ; save ax


    mov ax, VGA_SEGMENT         ; prepare ES which can't be loaded directly
    mov es, ax

    mov ax, 320                 ; load multiplier 320
    imul dx                     ; get row offset  Y * 320
    add ax, cx                  ; add column offset Y * 320 + X
    mov bx, ax                  ; load total address offset in bx

    pop ax                      ; restore ax
    mov [es:bx], al             ; paint color in vga memory add offset

    pop bx                      ; restore bx
    pop es                      ; restore es

    ret
Now just replace all set_pixel calls with set_pixel_fast and enjoy the blasting speed of direct memory access.
Upgrading the pixel to a player
Ok whats the minimum a player needs:
- a x coordinate
- a y coordinate
- a color
lets add them to the bottom of kernel.asm:
kernel.asm
...
player_pos_x: dw 150
player_pos_y: dw 10
player_color: dw 0x4
...
Now we can add a small helper function to gfx.asm:
gfx.asm
; helper function to draw a player pixel
draw_player:
    pusha                   ; save all registers

    mov ax, [player_color]  ; setup color
    mov cx, [player_pos_x]  ; setup x coordinate
    mov dx, [player_pos_y]  ; setup y coordinate

    call set_pixel_fast     ; call the draw function

    popa                    ; restore all registers
    ret
and call it in our game_loop
game_loop:
    call clear_screen
    call draw_player
    call sleep
This looks like a proper game_loop doesn't it ?!
...but our player can't move yet.
Getting keyboard input
Finally we should be able to move our player around and make use of our game_loop. There are two steps to reading a keyboard input from the BIOS. First part is int 16h ah=1 https://en.wikipedia.org/wiki/INT_16H where we check if any key has been pressed and if so we call int 16h ah=0 where we read the actual scancode of the pressed key into al.
kernel.asm
game_loop:
    call clear_screen
    call draw_player
    call sleep

    ;;; input section ;;;

    mov ah, 1                           ; get state of keyboard buffer
    int 0x16                            ; call the interrupt
    jz game_loop                        ; if the buffer is empty got back to the top

    ; else some key got pressed
    mov ah, 0                           ; get the scancode of the pressed key
    int 0x16                            ; call the interrupt

    cmp al, 'a'                         ; check if 'a'-key was pressed
    je move_left                        ; move the player left

    cmp al, 'd'                         ; check if 'd'-key was pressed
    je move_right                       ; move the player right

    cmp al, 'w'                         ; check if 'w'-key was pressed
    je move_up                          ; move the player up

    cmp al, 's'                         ; check if 's'-key was pressed
    je move_down                        ; move the player down

    jmp game_loop                       ; if any other key was pressed ignore it
    ;;; player movement ;;;

    move_left:
        sub byte [player_pos_x], 1      ; subtract one from the x position
        jmp game_loop                   ; go back to the top

    move_right:
        add byte [player_pos_x], 1      ; add one to the x position
        jmp game_loop                   ; go back to the top

    move_up:
        sub byte [player_pos_y], 1      ; subtract one from the y position
        jmp game_loop                   ; go back to the top

    move_down:
        add byte [player_pos_y], 1      ; add one to the y position
        jmp game_loop                   ; go back to the top
Conclusion
Assembly can be daunting at first but once you've moved a pixel or to around it can be fun.